Showing posts with label Retro Flowers Quilt Along. Show all posts

Monday, June 4, 2012

and the Winners are.....!

June 1st was the last day to submit your entries for the grand prizes in the Retro Flowers Quilt Along. After much deliberation with the judges over the weekend...here are our winners!

Christina's pick: Jennifer from Knotted Thread


Our other two grand prize winners are:


By Pam


By Diane

These choices were incredibly hard to make! So many of the submissions had amazing layouts and fantastic quilting. I was so impressed with everyone's work. Winners, I will be contacting you later in the day (after work) so that you can get your prizes. Congratulations! 

Thanks again to everyone for participating. Bianca and I had so much fun hosting this quilt along! Thank you also to our fabulous judges; Rachel, Christina, and Nova. We enjoyed having you on board!

Monday, May 21, 2012

Retro Flowers Quilt Along: Wrap Up

So we have done it, we have made it to the end of the quilt along! I have seen some beautiful quilts coming together in the flickr group and I am so excited to open submissions and begin the contest for the three grand prizes!

Thank you all for participating! This was my first quilt along, and I have learned so much from everyone's feedback. It was so fun and I definitely plan to do another one in the near future!

Ok, submissions. I know everyone wants to know how to get their quilts in the running for the three 75 dollar gift certificates from Fat Quarter Shop that we will be awarding! We tried so set up a regular linky party on both of our blogs, but we didn't have any success. SO! Our new plan might actually be simpler. We have created another flickr group called Retro Flowers Quilt Along Submissions. All you have to do is join the group and upload a picture of your finished quilt. For judging purposes, it might be good to include a close up of the quilting if it is hard to see on the full shot of your quilt.

Here are just a couple of the ones I have seen go by in our flickr group!

by Niveas

by meltingmarion

by knottygnome

by Jenn

Submissions will close June 1 and we will make our decision. Don't forget, it won't just be me and Bianca deciding. Rachel from Stitched in Color, Nova from A Cuppa And A Catch Up, and Christina from The Sometimes Crafter will all be helping us make our decision. I hope everyone is as excited as I am!!

I also want to give a big thank you to Fat Quarter Shop for sponsoring the prizes throughout our Quilt Along. They are fabulous, and if you have not checked out their website, you should definitely go see all of the fabulous things they have to offer!

Monday, May 14, 2012

Retro Flowers Quilt Along: Hand Quilting

It's the last post the the QAL already! I can't believe it. I can't wait to see all of the beautiful finished quilts. So for those of you not quilting your Retro Flowers on your sewing machines, here are a few tips, links, and suggestions for you hand quilting pleasure. 

Materials:

Anytime I quilt a quilt by hand, I use Quilters Dream Cotton batting in my quilt (my link takes you to a queen size piece, but the packages come in many sizes so be sure to look around). It is super soft and super friendly to the hand quilting process. 


When you make your quilt sandwich, you want to be sure to pin it in place prior to quilting it. Regular safety pins work fine, but I am partial to these quilting safety pins because they have a bend in them that makes them go through all three layers and pop back up with astounding ease. 


My absolute FAVORITE thread to quilt with is Perle Cotton. I don't have a specific place to tell you to get it because I generally find it in my local quilt store. I am sure you can find it online, but I don't have a great place yet to buy it. Suggestions welcome!! Anyway, it comes in different weights so you can use it in many different projects. For quilting, I generally stick to the Number 8 weight, but it is not uncommon to see the Number 5 or others used. 


Another option is regular DMC embroidery floss, and it is incredibly easy to come by. It is sold in almost any craft store as well as places like Walmart that have a craft section. 


You also want to make sure you have good needles that will adequately accomadate the heavier weight thread that you will be using for quilting, as well as an embroidery hoop. The hoop I have is a hand me down from my mom and is a large wooden 12 incher. I like being able to work in such a large space before having to move the hoop, but something smaller like an 8 inch hoop would work perfectly fine as well. 

Depending on the pattern you use, it is a good idea to have a marking tool to trace the pattern if need be. Later in the week, I will be posting about a couple different kinds (gadgets galore!), but you want to make sure you use something that is intended for that purpose and will come out in the wash. Pencil is REALLY hard to get off of fabric. Just fyi. Many stores care disappearing markers or chalk pencils, all of which will dissolve in the wash. 

I also just learned that many of these pens can be set with sun. Did you know that? Even if it is a disappearing pen made specifically for tracing patterns on fabric, you can permanently set it (to where it will never come out) by leaving your marked up fabric in the sun. I am going to check all of my pens to see if they come with warnings! And with that fun fact, lets move into the how to's of hand quilting. 

How To:

There are some great resources out there if you are just jumping in to hand quilting. My favorite is a tutorial by Rachel at Stitched in Color. She does a great job explaining all of the basics. You can also find some great tutorials on youtube.

So I made my quilt sandwich (backing, batting, quilt top), and got all the pieces pinned together. For tips on a great quilt sandwich, check out this tutorial by Elizabeth Hartman. I try not to leave an area more than approximately 6 square inches unpinned. The larger areas you leave unpinned, the more room the fabric has to move out of its happy place in the sandwich. 


It is also important to start your quilting in the middle of your quilt whenever possible. This allows you to accomadate any fabric that might move during the process. As you work outward, you can smooth and re-adjust the three pieces of the sandwich as needed.


I will be quilting around each of the petals approximately 1/8th of an inch off the petal itself. This puts the stitching right in the middle of the white around the square points (as shown below). 


You want to bring your needle up from the back to start with and pull your knot through so that it sits inside the sandwich in the batting. Again, for a great explanation of this whole process, see Rachel's tutorial. After that you want to try to just rock your needle down through the sandwich and back up again, picking up a couple stitches. I personally don't like to have more than three stitches on my needle at a time, particularly when going around curves. 


Once you get the hang of it, that's really all there is to it. You just keep going until you have quilted your whole quilt! My personal attraction to hand quilting is how soft the finished quilt is. Many quilts that are quilted by machine or long armed feel stiff when they are done. Hand quilting allows the quilt to maintain its ability to drape and be super snuggly. Not to mention that the hand quilting gives a unique look that you can't achieve any other way. It involves patience, but the end result is rather beautiful and definitely worth it. 

Some Great Examples:

There is so much room for creativity in hand quilting. Here are a couple examples of other great quilters who have taken on the challenge of hand quilting this pattern. Rachel used a basic running stitch in the seams or 'ditch' between her blocks. 

Made by Rachel at Stitched in Color

Katie silhouetted the shape of the flower with kind of a rippling effect moving out from the center of each petal in her pillow. (she also did all the piecing by hand!!!!)

Made by Katie at There and Back

Both of these are great examples on how to get creative with your quilting. Don't be afraid to play with color or do a pattern that is out of the ordinary. Sometimes the quilting can be the most breathtaking part of a quilt. Happy stitching and I can't wait to see the finished quilts, both machine and hand quilted! Make sure you hop over to the Flickr group and show us your work! Also, be sure to stay tuned for instructions on how to enter your finished quilt for the grand prizes!

Monday, April 30, 2012

Retro Flowers Quilt Along: Piecing your quilt and a giveaway!

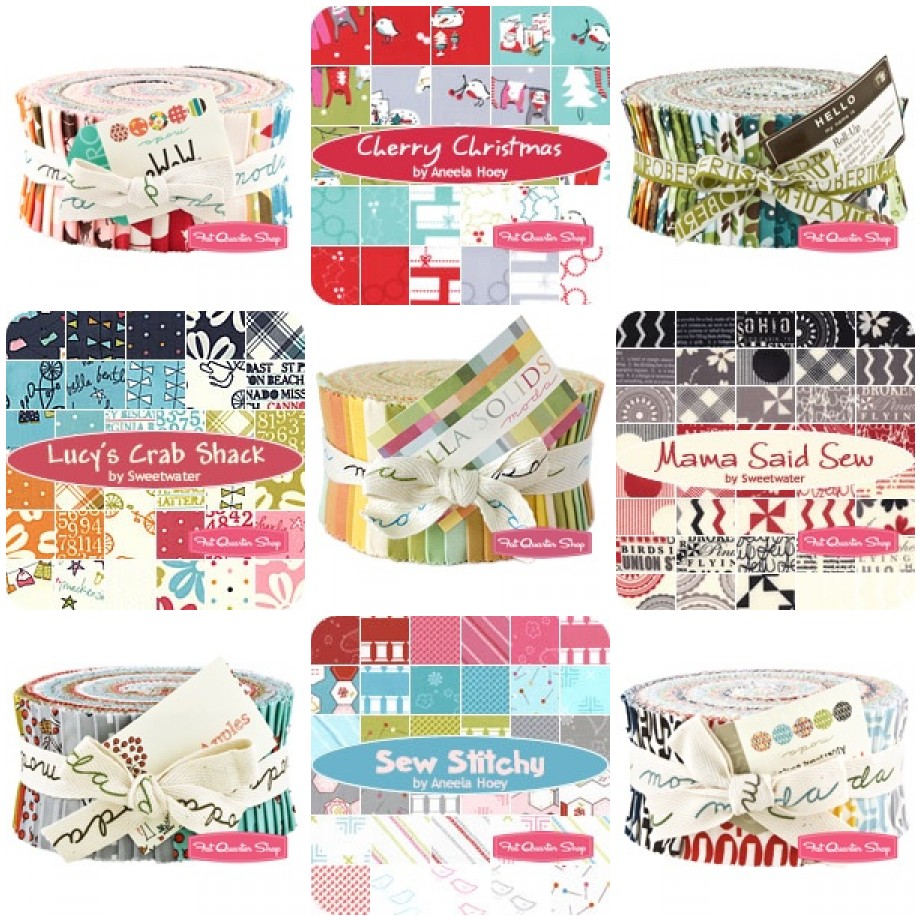
Have you pieced all your blocks?! I sure hope so. Because now it is time to piece the quilt top! And if you like free jelly rolls, read on about how you can win one from Fat Quarter Shop with little or no effort!


For the sake of being able to take pictures that are easy to see detail on, I am going to be using a mini size quilt for this post. The same concepts will all apply to the larger 16 block quilt.

When I piece a quilt top, I make a point to use the least number of long seams possible. The longer the seam, the more likely you are to have trouble with wonkiness. Not that you will necessarily; short seams are just a great precautionary measure, and much easier to manhandle.  Below is a roadmap of how I pieced this particular quilt. 


Start with 16 blocks


Sew them into 4 quadrants


Sew each quadrant to the one next to it (into hemispheres)


And then sew the hemispheres together. This way, I only have 1 long seam rather than 3


If you are doing 20 blocks, you could consider making your quadrants as shown above. Getting creative with your geometry helps maintain the over all structure of your quilt.

Some people prefer to piece their blocks in rows, and then sew those rows together. That is another great piecing option. There are many different ways to do it, and it all just depends on what is most comfortable for you, your machine, the space you have to work with, and what you are accustomed to. 


Regardless of your piecing geometry, it is a good idea to place pins at your seams to make sure they match up correctly. I like to drop two pins in at every seam, one on each side (as shown above). This allows me to be sure that the seams will not be tugged away from each other in either direction. 

Since the seams on this quilt are approximately every three inches, you might not necessarily need pins in any other areas. Again, it is all about your level of comfort and control of the fabric. 


Once you have pieced the first two blocks in your row or quadrant, you want to press the seams open as you did when piecing your block. This helps remove bulk and looks very crisp on the right side of the quilt. 


Again, when you piece the longer seam in your quadrant or start sewing rows together, you don't want to forget the pins. They are so essential to having your seams match up perfectly.  


Here is my first pieced quadrant. I really liked how it looked hanging in the window with the sun shining through it. If you are working in quadrants, you will now have 4 of them, each with 4 retro flowers. These get pieced together in the exact same method as each single quadrant was pieced. And then your quilt top is done!! Easy peasy.

Now for the giveaway! I am sure many of you saw Bianca's friday giveaway post. If you didn't win that one, now is your chance to try again! It is sooooooo easy. All you have to do is become a follower (by email or as a google reader). On Friday, I will randomly draw from the people listed as followers and some lucky winner will receive a jelly roll of their choice from Fat Quarter Shop!!!


These are just a few that caught my eye! Again, the winner will be announced on Friday! Good luck and happy piecing!!

Tuesday, April 24, 2012

April, what did you do with the sun?

Spring, summer, whatever, I am ready to be outside. What is with this terrible April weather? March had so many beautiful days! I am taking it a little personally if you can't tell. I have not gotten a ton of sewing done because I have been back and forth between home and my parents house in Pawleys Island trying to catch the little bit of sun we have been graced with. While I was there though, I did manage to get some pictures of the quilt I made my mom for Christmas out on their dock. Again, pardon the gloom.


I found some Denyse Schmidt Hope Valley on sale and obviously had to buy enough for a backing. It is sooo pretty in person. I almost like the back more than the front. I also just did basic straight line quilting with half inch spacing. I loooove the look, but I will probably space the lines out a little more next time for my own sanity. 

I planted my porch garden last weekend. Once my plants start to come up and look super awesome, I will document the progress. I have grape tomatoes, regular tomatoes, sweet peppers, zucchini, and pole beans. It was rather a unique experience to get my 18 inch terra cotta pots and 6 bags of soil up to my apartment on the second floor and out on to the porch without any man help. Can you say self sufficient? Woo hoo!

Also, for those of you doing the Retro Flowers Quilt Along, Bianca's post came out yesterday about piecing your block. It is fabulous! Make sure to check out her awesome tips! Next week, don't forget to pop by for my post on piecing your quilt!

Monday, April 9, 2012

Retro Flowers QAL: Curves are friends not foe

Ok everyone. The day is here. Time to tackle curves. Now while curves may seem daunting, they are actually not that scary once you get the hang of it. Pinning curves is the most traditional way to do them and is the method I will be using.

You may have heard of the curvemaster foot from some people in the flickr group and/or the pattern. It is another great tool in tackling curves. I personally have never used it, but I hear its fab! If you have any questions about using your curvemaster foot, I am sure everyone in the group would love to give you tips.

A couple quick things -

  • If you are new to curves, you might what to give it a trial run on some scrap fabric before using your beautiful quilt fabric, just to get the feel for it
  • Expect to un-sew. My stitch ripper is never far from me, and I do find myself having to un-sew on the regular
  • Remember this is fun! Don't stress yourself out over curves. 
  • If you need any more tutorials or explanations, you tube and the blog world have tons of videos and posts about curves. 

On to pins. I went out and bought a whole extra box of pins for this project. With curves, the more pins you use, the better your curve will turn out. Side note, this same process can be used with dissolving fabric glue that you can find at most craft stores. I have heard a couple people talk about substituting the use of it for the pinning.

Step one. Fold your pieces of fabric in half (right sides together) and press them tightly with your fingers in the center of the curve. This will leave a crease that is easy to see but not as permanent as one made with an iron.


Then, you lay your pieces (right sides together) on top of one another like the picture below matching up your creases. This ensures you are matching the centers of each piece.


Then pin through the pieces at the crease


And at each end. Once all three pins are in, your pieces should look like this. 


The next part gets tricky. Here is where you have to really watch your fabric. You want to start filling in pins between the ends of the curve and the center pin. As you do, make sure to wiggle your fabric to get the edges to line up all the way around. Since the fabric is cut on a curve (that goes through the bias) it will STRETCH. It is very very important to be cognizant of just how easily the fabric will stretch.

This is why pinning is important. You don't want to stretch the fabric to make it fit, more try to mold it into place. Also, you want to try at all costs to avoid pleating you fabric accidentally. After a couple tries, your finished pinned piece should look like this. 


I have done so many of these in the last few days that I have gotten comfortable with just six extra pins, but I encourage you to use more than that! There is no such thing as too many pins!

Sewing your curve is just like sewing any other seam, only you follow the curved edge of the fabric with your presser foot instead of just going straight. 


Now, I have a secret. I know it is wrong, and I know it is bad for my machine, BUT, I sew over my pins. Gasp, I know. Anyway, I find this helpful when it comes to keeping the fabric in place.

The biggest thing to watch out for while you are sewing is pleats. If you see one coming, put your needle down, lift your presser foot up, and wiggle the excess fabric around to help the edge lay flat. Pleats in the seam will show up in your background fabric after it is pressed, and we all know how much fun unsewing is. 

Continue to work your way around the edge of the fabric and that's it! 


Another tip: it is important to make sure you are sewing with a 1/4 inch seam. Don't trust that just because you machine says it is a 1/4 inch, that it actually is. If you measure the seam with a ruler, you can be sure of how big it is. If you find that your machine is off, just move your needle position or change the foot. I have to move my needle 2 places to the right to get a 1/4 inch!!

Once your are finished, your piece will look like this (the pins remind me of a peacock tail)


When pressing, I have found that pressing the seam towards the 'petal', or in my case the print fabric, is very important. 


If you have a light background and you press your seams towards the background, you will be able to see them after you make your quilt sandwich. I made that mistake when making my single girl. It's not the end of the world. I was 14 rings in when I realized it so needless to say I did not fix it. But, if you haven't started yet, its something to be aware of.

Phew this post is long. Lastly, to make this whole process go faster, I have found that it is much easier to pin a whole bunch of petals and then sew them. If you pin one sew one pin one sew one it is never ending. It is super easy to just sit in front of the TV or whatever and pin until you run out of pins, and then chain piece them on the machine. I have no idea why, but it feels like it significantly reduces your time. 

Well there you go. I hope this helps to put rest the fear of curves. Once you get to know them, they are just like any other seam, they just need a little extra love and care. I cannot wait to see all of the beautiful pictures of your petals start popping up!!!! If you have any questions still, feel free to ask and/or check out the flickr group. There is always lots to learn! 

**AMENDMENTS**

Since there was an amazing cry for pin-less curves, I figured I would look into some resources for you all. For those who took Rachel's curves class, likely none of this will be new to you. Nova graciously let me borrow the video she made for the Single Girl Quilt Along, but the same principles apply. 

I can't for the life of me figure out how to embed it so I will link you to it here.

This is another great resource that someone shared in the flickr group. 

You can also find the Curve Master Presser Foot here. This foot helps to guide your fabrics together without pins and maintain the 1/4 inch seam you need for this quilt. It seems you can apply this same method using a basic 1/4 foot with a side guard. 

The biggest principle of sewing pin-less curves is making sure you DO NOT stretch your fabric. I can't emphasize enough how easy it is to do this. I am not sure if the Single Girl Support Group is a public group, but if this link works for you, you can see why it is important to be mindful of stretching. 

In the videos I have watched, everyone seems to make a conscious effort to never actually hold the fabric pieces, but just to guide them along in an effort to mold them under the presser foot. This seems to reduce stretching issues significantly. You want to minimize pulling on that bias edge as much as possible. 

Don't forget, you have a lot of great resources in the Flickr group! Numerous members were part of the Curves Camp, and I am sure would be glad to pass on their knowledge on the subject. Feel free to put your questions out to the public. 

If you find curves daunting, I would say give the pinned method a try. Once you are comfortable with that, give it a go without the pins. There are so many ways to skin this cat, I don't want anyone to get discouraged with their curves! Hopefully you will find the way that works perfectly for you. Happy piecing!

Tuesday, March 20, 2012

A Few More Things

So I just set the fire alarms off in my apartment building. Mortifying....

Anyway. There are a few extra details that I thought I needed to include as I sat at my desk all day. Needless to say, I was not concentrating well. First, I only briefly mentioned Jill of Made on Main Street, the wonderful woman who makes the acrylic templates for this pattern. If you are looking for a method of cutting that is quicker than freezer paper, definitely scoot over to her site and grab those. I have them, and they are great! On Thursday, she will be doing a giveaway for some free ones. You don't want to miss that opportunity!

If you do buy them (or win them!), you might also consider some Invisigrip for the bottom of them so they don't slip (although not imperative), as well as a 28mm rotary cutter. It's like the regular rotary cutter's little sister. It is super cute and super necessary for turning the curves of the templates. I would hate for anyone to be missing things that would make life easier when we get started!

Also remember, tomorrow Christina will be giving away 5 patterns on her website!!! Definitely visit her. You wouldn't want to miss that. I will keep updating if I think of anymore important things, but that should be it. Bianca's first post about templates and cutting will give you tons of tips and tricks on the best way to get all of your fabric cut out pretty efficiently. Get excited for that! While you are waiting, be sure to check out our other blogger friends and join the flickr group! Feel free to post pictures of your gorgeous fabric choices. We would all love to see!

Thanks again to everyone participating! We are excited to have you and very excited to get started!

Retro Flowers Quilt Along

I am pleased to announce that the surprise I have been planning is the Retro Flowers Quilt Along! I will be hosting it with Bianca of Sweet Diesel Designs. We will have prizes courtesy of Fat Quarter Shop throughout the process as well as some final product prizes at the end! Everything you need to know can be found here, but I will give a quick overview in this post as well! I hope you all will join us in this fabulous quilt along!

Christina's (The Sometimes Crafter) gorgeous quilt

Pattern: The pattern can be purchased here for only $10. It will show up in your email immediately upon purchase, and you won't have to spend any time waiting for it to arrive! You must buy the pattern to participate in the quilt along. We will not be providing templates or any specific instructions found in the pattern.


Schedule of posts:
4/9: Sewing Curves - Megan
4/23: Piecing Blocks - Bianca
4/30: Piecing the Quilt - Megan
5/7: Quilting By Machine - Bianca
5/14: Quilting By Hand - Megan
5/23: Wrap Up and Linky Party Opens!
6/1: Submission Deadline for Grand Prizes


Prizes: We will be giving out a total of 5 prizes. 2 will be given away on our blogs sometime in April. These will be a jellyroll of your choice from Fat Quarter Shop! To enter to win these, all you have to do is become a follower on our blogs! Thats it! The other 3 grand prizes will be given out at the end of the QAL. One winner will be picked by Christina as the quilt that she feels most embodies the way she envisioned the pattern. The other two winners will be picked by myself, Bianca, Nova of A Cuppa and A Catch Up, and Rachel of Stitched in Color as the quilts with the best and most modern use of color and fabric. All 3 of these winners will get a $75 gift certificate to Fat Quarter Shop!


Flickr Support Group: Please also join us on Flickr! Here everyone can upload photos of their progress and discuss relevant topics. It is a great forum to express any problems you run into and receive help from the whole group! It is also so fun to see all of these beautiful quilts come together! Definitely hop over and join us!

The Button: If you are planning to participate or would just like to promote us, grab this button from my sidebar! We would love to see it on your blog!


Many of our blogger friends have agreed to give us a shout out post to kick this quilt along off right! Hop on over to their blogs and check them out. They are all very talented and full of fabulous ideas and creativity!

3/20: Stitched in Color -Rachel
3/21: The Sometimes Crafter - Christina (who will be giving away 5 free patterns on her blog in honor of us using her pattern! Get over there quick!!)
3/22: Made on Main Street  - Jill (who will be giving away 3 sets of acrylic templates on her blog!! Hurry over there too!!)
3/23: A Cuppa and A Catch Up - Nova
3/24: I'm a Ginger Monkey - Katy
3/25: Lucy and Norman - Megan
3/26: Ellison Lane Quilts - Jennifer
3/27: Imagine Gnats - Rachael
3/28: Mama Love Quilts - Nicole
3/30: Knotted-Thread - Jennifer
3/31: Life's Rich Pattern - Annabella
4/1: Pajama Mama - Kristen

Again, if you need any more detail...particularly on the prizes and how to enter...click on the 'Retro Flowers Quilt Along' tab at the top of my page or here. 

We hope you will join us and can't wait to get started!!!!