Wednesday, February 27, 2013

my ColorWheel

For those of you who have not already seen this go by on Instagram, here is a peak into my current project.


My color wheel. It was born in curves class with Rachel of Stitched in color. The pattern is her Wheel Quilt which she sells in her online store. 


I am so enamored with color right now. As quilters, we all are, but what fascinates me is how smoothly color can move throughout the spectrum, easily blending from one to the next. I looove rainbow quilts and am dreaming up one for myself.

As a general rule, I am drawn to gorgeous tone on tone prints that often read as a single color. Rarely will I buy a blue on a yellow, for example, or a multi colored print because I have a hard time working them into my projects. That is something I noticed recently about my stash when I was organizing it. For me, fabric is like a fresh set of paints.

I am so smitten with this lovely wall hanging. For the background, I plan to use some of the white/black prints from Architextures; specifically the text, foliage, and ledger.


Unfortunately for me, I have blown my fabric budget for the month so I will have to wait until I get paid next friday to order it. Sigh. It is a WIP I am happy to have started though.

And! Thanks for all the feedback about my spam problem. I think it is under control, and I didn't have to turn the word verification back on!!

Tuesday, February 26, 2013

Let's talk about SPAM

and no, not the food. I don't know about other blogger users, but I have been getting bombarded with spam comments. So much so that I often lose comments from the people I enjoy talking to in the melee.  And lately, the comments have been making it through the blogger filter and into the comments section of my posts. I'm frustrated. I don't want to turn the annoying filter back on, but I am almost at my wit's end. Is anyone else experiencing this problem? Do you know of a way to shield yourself from spam other than by using the word filter? I know this is a boring post for most people, but ugh, I am so over the spam. If I do have to turn it back on, I hope everyone will still comment! It is my favorite part of blogging.

And Blogger, if you read this, please filter the SPAM!

Sunday, February 24, 2013

craving some Sun

I am pretty ready for winter to be over so that I can be outside enjoying the sunshine. Inspired by my want to feel those warm rays, I made this little mini that I am so in love with.


It measures only 16.5 inches square, and the center sun is only 8 inches square. The mini piecing was a fun challenge. I normally work with bigger blocks and patterns. So now to quilt it. I still haven't decided how to go about that. 


I have seen all the pictures of Quilt Con go by, and I am so jealous of those who got to go! I am determined to make it next year....as well as to this year's Sewing Summit. I had a fabulous weekend regardless because my boyfriend was in town. Sadly tomorrow is Monday and it's time to start the work week over again. Can't wait to see all the Monday Quilt Con posts!


Tuesday, February 19, 2013

a Quick One

do. Good Stitches kicked 2013 off right in the Believe circle! I had the pleasure of leading January. Here are the blocks sent in by the lovely Believe ladies.


This week I will be piecing and quilting to hopefully mail it out this weekend or in the beginning of next week. Right now, they are just randomly stuck up on my design wall...some even in the wrong direction I noticed. Haha! We used this tutorial from Holly of Bijou Lovely. I think they turned out great!

February brought on some more Japanese x and plus blocks!


I used my tutorial which results in 13 inch blocks including seam allowance (12.5 sewn together) rather than the standard 8 inch. We were asked to be scrappy but keep the triangles neutral. I can't wait to see how it turns out!

I am working on a super fun, semi secret project for a friend. Hopefully I will get to share pictures soon. I looooove to get to sew for other people and this present is no exception!

Saturday, February 16, 2013

Envelope Pillow Tutorial

This week was not a good sewing week for me. I didn't get much done, at all. But! I did have an opportunity to churn out one of the curves class projects that I was most excited to do. Here is my clamshell pillow.


Yes, I bit the bullet and cut up some of my Good Folks scraps. I have so little left at this point but, I figured if the Good Folks quilt was going to live out on the couch, a pillow to accent it would just be lovely. I also hugely stepped out of my comfort zone with the background color. I LOVE neutrals, but this pillow insisted that it needed a color to really create a pop.

I am still pretty new to pillows, but I have learned that I love the envelope method. Why? Because you can change out pillow covers with tons of ease, no messing with zippers, and you pillows still have a gorgeous, clean, finished look.

The pillow I had to cover was 19" from seam to seam, so my measurements will be based on that. However, if you scroll down, I have created a table that should help you create the right size pillow cover for many pillow sizes. Hopefully that helps!

Ok, here we go. For my 19" pillow, I cut the front into a 19.5" square. This would allow me a quarter inch seam on all sides. For the backing, I cut two rectangles measuring 15.5 x 19.5".


Here is where you adjust these measurements based on your pillow size. If you are covering an existing pillow and you aren't sure how big it is, use a flexible measuring tape to measure from seam to seam. 

If you have a:
10" pillow - front:10.5" square
                    back: two rectangles 10.5 x 6"
11" pillow - front: 11.5" square
                    back: two rectangles 11.5 x 7"
12" pillow - front: 12.5" square
                    back: two rectangles 12.5 x 8"
13" pillow - front: 13.5" square
                    back: two rectangles 13.5 x 9"
14" pillow - front: 14.5" square
                    back: two rectangles 14.5 x 10"
15" pillow - front: 15.5" square
                    back: two rectangles 15.5 x 11"
16" pillow - front: 16.5" square
                    back: two rectangles 16.5 x 12"
17" pillow - front:17.5" square
                    back: two rectangles 17.5 x 13"
18" pillow - front: 18.5" square
                    back: two rectangles 18.5 x 14"
19" pillow - front: 19.5" square
                    back: two rectangles 19.5 x 15"
20" pillow - front: 20.5" square
                    back: two rectangles 20.5 x 16"

Ok, now that your pieces are cut, fold over one edge on each back piece 1/2" with you iron. This should be an edge that measure the same length as the front on your pillow (i.e., on mine, it was a 19.5" edge). One you have these edges pressed, run a top stitch (in a matching color) on the right side of the fabric about 1/4" away from the pressed edge to lock it in place. These will be the edges that show on the outside of your pillow.


Now, lay out the front of your pillow, right side up. Match the raw edge of one backing piece to a side of your front piece, wrong side up (see below).


Notice the hemmed seam is in the middle of the pillow rather than matching a raw edge. This is important! Now, lay the second backing piece the same way on the opposite side of your front piece. Raw edge to raw edge and wrong side up. 


Before you start pinning, be sure you have right sides together and that neither of the hemmed seams are touching an outside edge.

Ok, pin alllll the way around. 


And now sew around all four sides, backsitching when you start and when you stop. Make sure you don't leave any holes as this does not need to be turned right side out through a raw edge. I also like to pivot at the corners (see picture below) rather than start and stop at each to maintain the integrity of the seam. 


Once you have finished sewing the four sides, you can turn your pillow right side out through the envelope enclosure in the back and, you have a nice new pillow cover!!


Im so happy to finally have such a great pop of color on my boring white couch!

Sunday, February 10, 2013

the Single Girl

My Single Girl. What a journey this quilt has been.


I started it during the Single Girl Quilt Along while I was still what I considered a beginner (I don't think I even had 5 quilts under my belt). I was inspired, found the perfect fabric, and was a motivated cutting machine. As with many other things, the newness faded, and I began to see that I had taken on quite a challenge. It fell to the wayside for 5 or 6 months, sitting in the WIP pile staring at me. Finally, one day, I decided I was going to, under no uncertain terms, finish this quilt before I started anything new.


When it was finally whole and pieced, I just couldn't believe it. If you have the opportunity to look closely, its terrible, I mean really terrible. I ran out of white thread while piecing and rather than going out and buying more like a normal person, just switched to dark grey. Dark grey!! And then pink when I ran out of the grey. The blocks themselves, they worked out great. The curves actually weren't all that hard compared to some of the other ups and downs. 8 blocks into my 16 total, I figured out I was pressing my seams to the outside of the curve or background fabric rather than to the inside where it wouldn't be seen. Half my blocks done.... ha please, I was not about to take them apart.

Sighing to myself, I continued on. The apartment I lived in was...unique. It was my first apartment out of college in what used to be an old factory. Cool on some levels, but it had almost no windows. My sewing room actually did not have any windows at all, or an over head light, just the lamp that I used to sew by. Poor lighting being what it was, I did not notice that the solid cream I had chosen for my background actually had a distinct right and wrong side (It wasn't a Kona, some weird brand my quilt store carried). You can only see it if the light hits it right, but one side 'shines' if you will, and one doesn't. Holy hell my quilt looked like a checkerboard. Panic set in at this point, and I was so mad that all of this hard work was going to end up giving me an ugly quilt.


Now we all know that the maker of the quilt can see the imperfections more than anyone else (and I am really hard on myself), but I sucked it up and kept going, hoping that in the end it wouldn't be noticeable. It was a year ago that I finished piecing the top, with some seams that couldn't even be called a scant 1/4 inch as a joke. I figured because of its size, I would never be able to quilt it on my machine. So naturally, I asked my mom to put it on the long arm. She said sure, if you trim the thread tails. Pshhhh, I was so over this quilt by that point. It sat in a closet for a while until every now and again I would pull it out, only to end up putting it right back.

This last time however, I decided that I had procrastinated enough. And not only that, but I decided to quilt it myself. And in the end, I love it. It is stunning. I don't just love it because I made it, I love it because of the journey, because of the amount of learning that went into to, because it is totally imperfect and so am I. Since finishing it last week, I have not only used it at all times on the couch, but moved it to my bed at night as well. I used Quilters Dream Cotton as the batting which makes it extra snuggly. The back and binding are Kona Aloe which is also used in the rings themselves.

So here it is, my finished Single Girl.

Tuesday, February 5, 2013

Fabric Weakness

Everyone has that sacred fabric. That one line you've been collecting or the piece you can't cut. The fabric that started it all for me was Amy Butler's Wallflower from the Lotus line. For some 6 or 7 years, I have been on a quest to own a yard of each of the 7 prints.  For Christmas, my amazing boyfriend gifted me the green and the apricot. Swoon. 


Now I have 6!! 6 of the 7!! I am so close to my goal. The only one I am missing is the gray. One day my dear fabric, one day. 


For a really long time, I couldn't cut them. But after a little prodding, I've started using small pieces here and there in things that I love. I mean, as fun as hoarding fabric is, we buy it to make beautiful things, right? Haha. What is your fabric vice?

Monday, February 4, 2013

Rainbow Scraps

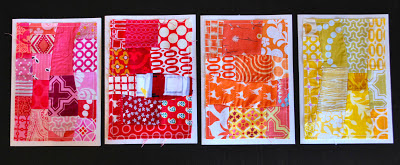
Curves class with Rachel of Stitched in Color started and passed me right by. This weekend though, I got to start on some projects. The first was a set of improv curve notecards. These were so relaxing! Creativitiy was flowing uninhibited and here is my interpretation. I love them. Like L.O.V.E. them.


Needless to say, these will not be my last improv scrap curves, or my last rainbows. With all this creativity flowing, its time to put some of these ideas on paper!

Saturday, February 2, 2013

Thinning out the WIPs

Life is officially back to normal. My project in Columbia is over, and I am once more actually living in the place where I pay rent. What a concept. I've made a point to try to get some of the WIPs I have lying around actually complete and usable. I am happy to announce that I have made some progress!

The #scrappytripalong got quilted and bound (finished pictures to come after binding)


and o, do you remember the Single Girl? The bane of my existence? Haha, not really. I made it during the Single Girl Quilt Along (well started it). Then I took a break and actually finished it like 6 months later. Since then, it has been sitting in a closet (something like 18 months to 2 years) ignored, largely due to my fear of quilting it. With my new found confidence in quilting, I decided to tackle it today.


Turns out it is really heavy. That aside, I got it done and I am super proud. I don't want to spoil the final product, so I will have pictures up as soon as the binding is on!

And next, the Good Folks quilt. Basted and ready for a turn on the machine. I'm actually hesitant on this one because I have no idea what to put on it. Hmmm. I also still lack binding. I really really want to bind it in the blue fortune or the black buttoned up, however those are very hard to come by. I may just continue to troll etsy and see if anything good comes along.


And what else to do on your first saturday back home but organize scraps?! I have always had them sorted by color, but never by size. A lot of my projects for curves class (which obviously I am ridiculously behind on) use scraps, so I am excited to have them organized and ready for when I dive in!


Now back to enjoying my home sweet home!