I am pleased to announce the Hemispheres QAL Winner! The voters picked Anya Nixon! Anya, I will shoot your email over to Tammy at Marmalade Fabrics and she will be in touch. Thank you everyone for participating!
Make sure to keep up with the new patterns released from Aria Lane. I have a few more coming soon as do some of the other designers! To be kept up to date, sign up for their newsletter! Happy sewing!

Showing posts with label Hemispheres Quilt Along. Show all posts
Showing posts with label Hemispheres Quilt Along. Show all posts
Sunday, December 15, 2013

Monday, December 9, 2013
Hemispheres QAL {Link Up}

Then link up your finished Hemispheres quilt top or finished quilt below!
I have changed the dates a little since my technical difficulties with my internet today delayed this post so much. You can link up today and tomorrow, and then on Wednesday, the chance to vote on your favorite top will be available! Please come vote and help us pick the winner of this gorgeous stack of fabric. The voting will be open until midnight on the 14th, and then the winner announced on the 15th!
So link up now and check back to vote on Wednesday! Can't wait to see what everyone has made! Thanks again to everyone who participated! I have really enjoyed seeing everyone's quilts come to life!
Monday, December 2, 2013
Hemispheres QAL {Giveaway Winners!}
Yay! We have some winners! Our random number generator picked numbers three and eighteen! Congrats Stephanie and Rachel! I will email you soon and let Tammy know that you guys are the winners!

Thanks to everyone for entering! I was so pleased that so many people found the quilting tutorial helpful! If you follow me on Instagram, you'll know that I have a bit of a new obsession. It's called the Gypsy Wife. I will post about my progress this week!

Thanks to everyone for entering! I was so pleased that so many people found the quilting tutorial helpful! If you follow me on Instagram, you'll know that I have a bit of a new obsession. It's called the Gypsy Wife. I will post about my progress this week!
Monday, November 25, 2013
Hemispheres QAL {Quilting}
So before we get started, is anyone interested in a giveaway? Leave a comment on this post and enter to win one of two Kona Bundles from Marmalade Fabrics. I don't know about you, but I have had a rough two weeks, and a giveaway is definitely necessary :)

So quilting. I am going to show you the method of quilting that I used on my original Hemispheres Quilt. This method uses concentric circles echoing out from a single point. I decided to use just some solid white in my tutorial so that the detail of what I was doing would show up better than on a print or than on my wall hanging. I should preface this by saying that this is not a tutorial on Free Motion Quilting. I am sure it can be done with free motion, but that is not a skill I yet possess. Plus, I want people who, like myself, cannot master FMQ to have some options other than straight line quilting. That said, lets do this.
So first, find any round object that is a good size for tracing your center circle. For me, the lid of a mason jar works perfectly. It is still small, but not too small that you have trouble getting a smooth curve with your machine.


So using a ruler, I put my needle down on the spacing that I want. In this instance, I am using 1.5". Normally I use something much smaller like 0.75". This is just so that I can show the technique. With the needle down, I then insert the guide bar, line it up to the edge of my ruler, and screw it in. Now we are ready to sew!


So quilting. I am going to show you the method of quilting that I used on my original Hemispheres Quilt. This method uses concentric circles echoing out from a single point. I decided to use just some solid white in my tutorial so that the detail of what I was doing would show up better than on a print or than on my wall hanging. I should preface this by saying that this is not a tutorial on Free Motion Quilting. I am sure it can be done with free motion, but that is not a skill I yet possess. Plus, I want people who, like myself, cannot master FMQ to have some options other than straight line quilting. That said, lets do this.
So first, find any round object that is a good size for tracing your center circle. For me, the lid of a mason jar works perfectly. It is still small, but not too small that you have trouble getting a smooth curve with your machine.

Trace your object using a water soluble or heat removable marking pen (test it out first to make sure it diappears!) on your quilt where you want the center of your quilting to be. I generally toss mine off center somewhere.

Now, with your machine, line up on the circle you just drew. Before you make your way around the circle, take a couple stitches forward and a couple stitches backwards to lock your stitch in place. You want to do this at the beginning and end of every circle. Otherwise, your quilting will come out in the wash.

Now, begin to sew along the circle you drew. Ease through the curve like you did when you were piecing, trying to start/stop as little as possible so that you don't end up with angles. If you are worried about not being able to get a smooth curve, trace something a little bigger. The bigger it is, the easier it will be to guide your machine through that circle. Since this circle will be our center, it will be the smallest and have the tightest curve. All the curves that follow will get easier as you echo out.

Once you have completed your circle, make sure you backstitch at the end to lock it in place.

To get exact spacing between your concentric circles, I use this tool that came with my machine. It is a guide bar that you can insert into the arm that holds your presser foot. If your machine didn't come with one, I am sure you can buy one that attaches similar to how they make walking feet that attach. (feet? foot? idk)


Line up the guide bar on the first circle you sewed. While sewing, you will want to spend more time watching that guide bar and keeping it lined up than you will watching your needle. As long as that guide bar is in the right place, your stitches will follow. Again, backstitch as you begin your next circle.


Once you get to a place where no more complete circles will fit on your quilt, you finish out the corners as arcs. You still line up on your previous circle, but you stitch from one edge of the quilt to the next.


And here is the finished product! Again, you might want to do your lines much closer together. Mine always fall between 0.5" and 1". This 1.5" could be good on a really huge quilt, but for most, I would suggest keeping it in the same range as straight line quilting.

Happy quilting! Can't wait to see how all of the Hemispheres turn out and how you decide to quilt them!
Monday, November 4, 2013
Hemispheres QAL {Gluing Curves}
Ok, so if you weren't a huge fan of the idea of pinning all your curves, but you aren't sure that you can freehand them, gluing might be for you. You will need a washable glue that is safe for fabric, Elmers works great. It is also handy if you have a tip of any kind that will allow you to control the flow of the glue a little better than your standard top.

The steps for glue basting and pin basting a curve are essentially the same. First, you want to fold both you concave and convex pieces in half and finger press them so that you have a little crease along the center line. It is important to line your pieces up in the center so that you don't end up with too much bulk on one side or the other.
Next, rather than pin through these lines, put a small drop of glue on the center line of the convex piece.

Then, place the center line of the concave piece direction on top of this glue dot. You want to then set that glue using a hot dry iron.

Once you have your center set, you want to put a small dab of glue right on the left and right edges of the convex piece.

Then, just as you did with pinning, bring the edges of the concave piece up to meet right on top of those glue dots. Again, heat set your glue with a hot, dry iron.


Now, if you are comfortable with curves and your machine, you can stop here and align the rest of the edges as you sew. If you want your basting to give you a little less movement in your curve while you sew, you can add more dots between the ones that you have already heat set just as you did with pins. The number of glue dots you use is completely based on your comfort with your curve and how much control you want to have when sewing it.
So you have the instructions on how to trim the blocks in your pattern, but I wanted to go over it really quickly in case it doesn't make sense for everyone. Basically, you need to just make sure that you have only a quarter inch of background at the edges. That way, when you sew two hemispheres together, they touch.
So line up your ruler so that you have the quarter inch line laying on your seam ON BOTH EDGES. If you don't line both edges up, you will cut your background wonky.


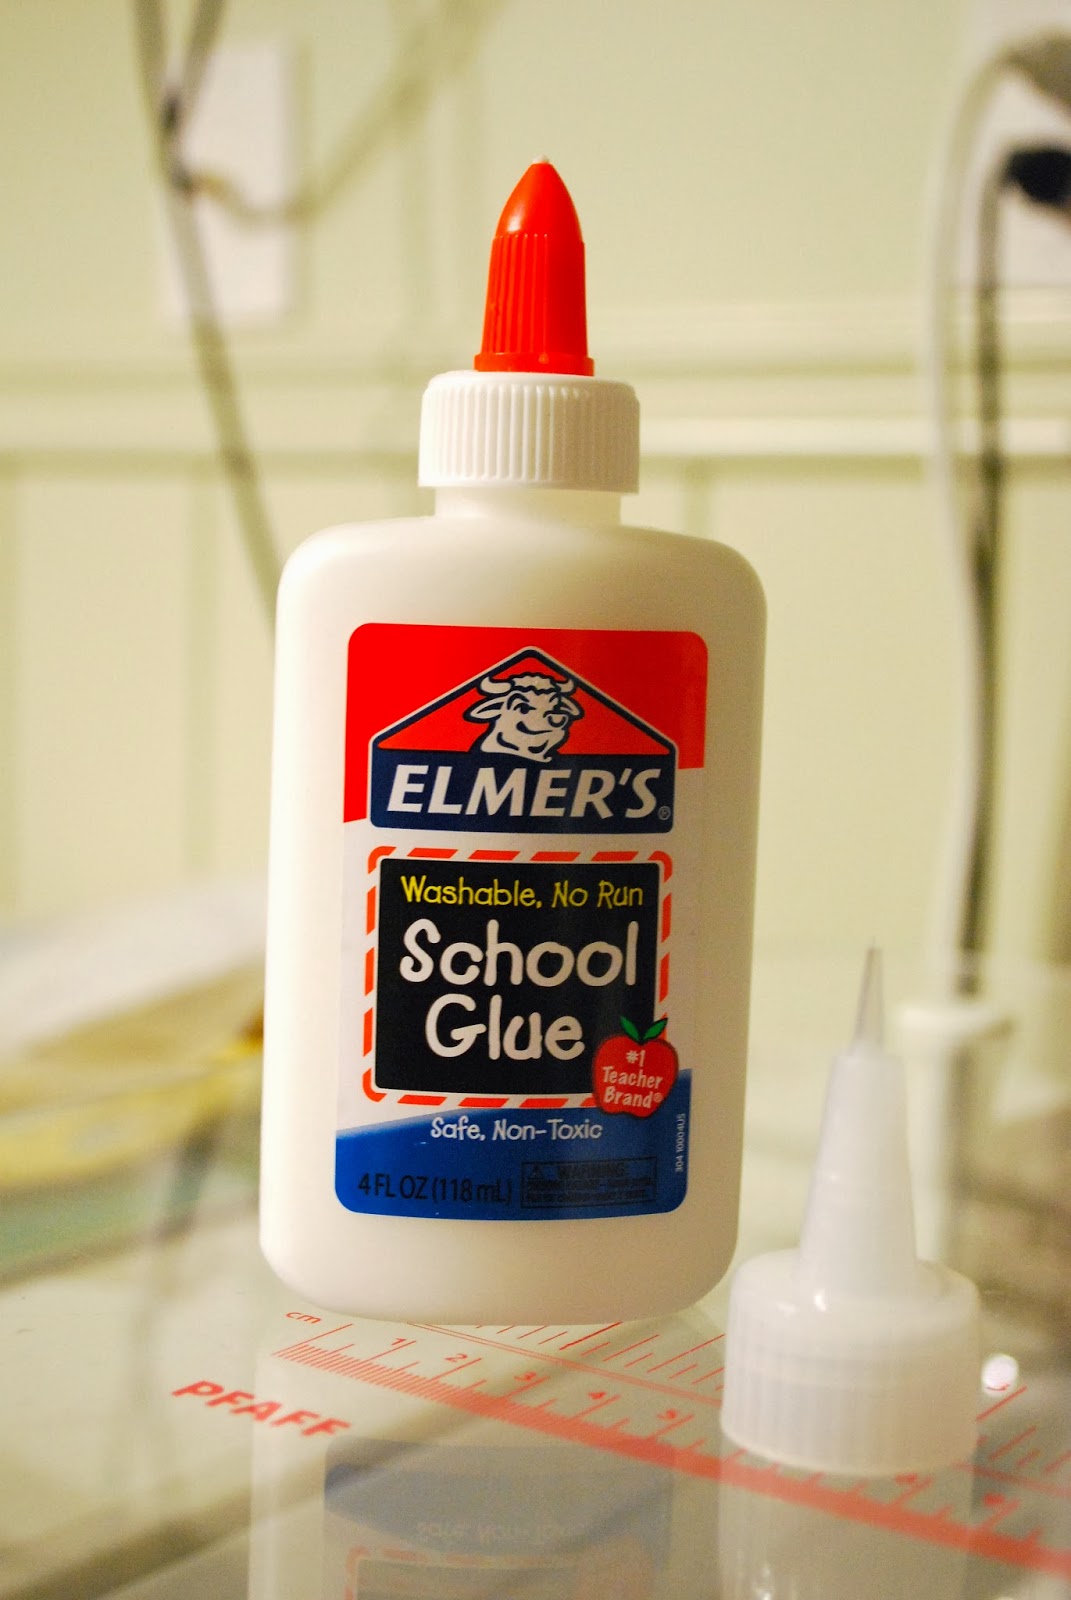
The steps for glue basting and pin basting a curve are essentially the same. First, you want to fold both you concave and convex pieces in half and finger press them so that you have a little crease along the center line. It is important to line your pieces up in the center so that you don't end up with too much bulk on one side or the other.
Next, rather than pin through these lines, put a small drop of glue on the center line of the convex piece.

Then, place the center line of the concave piece direction on top of this glue dot. You want to then set that glue using a hot dry iron.

Once you have your center set, you want to put a small dab of glue right on the left and right edges of the convex piece.

Then, just as you did with pinning, bring the edges of the concave piece up to meet right on top of those glue dots. Again, heat set your glue with a hot, dry iron.


Now, if you are comfortable with curves and your machine, you can stop here and align the rest of the edges as you sew. If you want your basting to give you a little less movement in your curve while you sew, you can add more dots between the ones that you have already heat set just as you did with pins. The number of glue dots you use is completely based on your comfort with your curve and how much control you want to have when sewing it.
So you have the instructions on how to trim the blocks in your pattern, but I wanted to go over it really quickly in case it doesn't make sense for everyone. Basically, you need to just make sure that you have only a quarter inch of background at the edges. That way, when you sew two hemispheres together, they touch.
So line up your ruler so that you have the quarter inch line laying on your seam ON BOTH EDGES. If you don't line both edges up, you will cut your background wonky.


Once you trim your background fabric, flip the block 180 and trim the other side. And there you go!

Sorry this got up late! I was having some super huge technical difficulties. :( Thanks for the patience!!
Monday, October 28, 2013
Hemispheres QAL {Pinned Curves}
Ok everyone. The day is here. Time to tackle curves. Now while curves
may seem daunting, they are actually not that scary once you get the
hang of it. Pinning curves is the most traditional way to do them and is
the method I will be using (don't forget that glued curves and pinless curves are also going to be coming up). I also suggest pinning your curves if you are new to curved piecing (personal opinion!). Many people have very strong opinions on whether to pin or not pin curves. Pinning takes longer, but I (personally!) think you get better results. I should also clarify and say that I have tried pinless curves and just cannot get the hang of it. However, many many other people say it is wonderful. Feel free to try all the methods and see which one you like most!
A couple quick things before we start pinning-
Fold your pieces of fabric in half (right sides together) and press them tightly with your fingers in the center of the curve. This will leave a crease that is easy to see but not as permanent as one made with an iron. I know it is hard to see in my photo, my apologies.


Lastly, to make this whole process go faster, I have found that it is much easier to pin a whole bunch of curves and then sew them. If you pin one sew one pin one sew one it feels never ending. It is super easy to just sit in front of the TV, or whatever, and pin until you run out of pins, and then chain piece them on the machine. I have no idea why, but it feels like it significantly reduces your time.
If the trimming instructions trip you up, feel free to ask any questions here or in the Flickr group. I will cover it fully in the next post, but I know some of you have or will be getting started on trimming before then.
A couple quick things before we start pinning-
- If you are new to curves, you might what to give it a trial run on some scrap fabric before using your beautiful quilt fabric, just to get the feel for it
- Expect to un-sew. Like in anything else, not every curve will be perfect.
- Remember this is fun! Don't stress yourself out over curves. When you step away from your quilt, you cannot see tiny pleats or any other common curve imperfections.
- With pinned curves, the more pins you use, the better your curve will turn out.
- If you need any more tutorials or explanations, you tube and the blog world have tons of videos and posts about curves.
Fold your pieces of fabric in half (right sides together) and press them tightly with your fingers in the center of the curve. This will leave a crease that is easy to see but not as permanent as one made with an iron. I know it is hard to see in my photo, my apologies.

Then,
you lay your pieces (right sides together) on top of one another like
the picture below matching up your creases. This ensures you are
matching the centers of each piece. Then pin through the pieces at the crease.

And at each end. Once all three pins are in, your pieces should look like this.

The
next part gets tricky. Here is where you have to really watch your
fabric. You want to start filling in pins between the ends of the curve
and the center pin. As you do, make sure to wiggle your fabric to get
the edges to line up all the way around. Since the fabric is cut on a
curve (that goes through the bias) it will STRETCH. It is very very
important to be cognizant of just how easily the fabric will stretch. If you are seeing your background fabric looking very warped and wavy on the edges of your pieced curve once it is finished, it is probably because you inadvertently stretched your pieces.
This
is why pinning is important. You don't want to stretch the fabric to
make it fit, more try to mold it into place as it is pulled through the machine (or while you are pinning). Also, you want to try at
all costs to avoid pleating you fabric accidentally. Your finished pinned piece should look like this.

I
have done so many of these in the last few days that I have gotten
comfortable with just six extra pins, but I encourage you to use more
than that if it makes you comfortable! There is no such thing as too many pins!
Sewing
your curve is just like sewing any other seam, only you follow the
curved edge of the fabric with your presser foot instead of just going
straight. Try to turn through the curve smoothly to avoid the stop start turning that will give you an angled curve rather than a smooth continuous curve.

Now,
I have a secret. I know it is wrong, and I know it is bad for my
machine, BUT, I sew over my pins. Gasp, I know. But frankly, I don't care. I find this
helpful when it comes to keeping the fabric in place and making sure the fabric doesn't stretch. Truthfully, I sew over pins any time I am using them.
The
biggest thing to watch out for while you are sewing is pleats. If you
see one coming, put your needle down, lift your presser foot up, and
wiggle the excess fabric around to help the edge lay flat. Pleats in the
seam will show up in your background fabric after it is pressed, and we
all know how much fun unsewing is.
Continue to work your way around the edge of the fabric and that's it!

Another
tip: it is important to make sure you are sewing with a 1/4 inch seam.
Don't trust that just because you machine says it is a 1/4 inch, that it
actually is. If you measure the seam with a ruler, you can be sure of
how big it is. If you find that your machine is off, just move your
needle position or change the foot. I have to move my needle 3 places to
the right to get a 1/4 inch!! 4 if I want a scant 1/4 inch.
Once your are finished, your piece will look like this.

When pressing, I have found that pressing the seam towards the convex piece, or the hemisphere, is very important, especially if you have a light background. The only time I would reccomend not doing this, is if your hemispheres are light and your background is dark.

If
you have a light background and you press your seams towards the
background, you will be able to see them after you make your quilt
sandwich. I made that mistake when making my single girl. It's not the
end of the world. I was 14 rings in when I realized it, so needless to
say I did not fix it. But, if you haven't started yet, its something to
be aware of.
Lastly, to make this whole process go faster, I have found that it is much easier to pin a whole bunch of curves and then sew them. If you pin one sew one pin one sew one it feels never ending. It is super easy to just sit in front of the TV, or whatever, and pin until you run out of pins, and then chain piece them on the machine. I have no idea why, but it feels like it significantly reduces your time.
If the trimming instructions trip you up, feel free to ask any questions here or in the Flickr group. I will cover it fully in the next post, but I know some of you have or will be getting started on trimming before then.
Well
there you go. I hope this helps to put rest the fear of curves. Once
you get to know them, they are just like any other seam, they just need a
little extra love and care. I cannot wait to see all of the beautiful
pictures of your hemispheres start popping up!!!! If you have any questions
still, feel free to ask and/or check out the Flickr Group.
Monday, October 21, 2013
Hemispheres QAL {Color, Fabric, and Cutting}
Are you excited!??!!? I am. Obviously. Haha. Ok. Let's start talking about your quilt! If you have not gotten your pattern yet, pop over to Aria Lane and scoop one up!
Fabric
The first step will be to decide what kind of fabric you are going to use. Solids? Prints? Both? You've seen this image a few too many times by now. It's the original Hemispheres done in Kona Solids.

Here are some pictures of the quilts done by our testers. This first one is a take on the original. Multi colored with a gray background done in a twin size.
 |
| Twin size Hemispheres quilt top by Stephanie Daniel |
This one is done monochromatic with one pinwheel popped in the bottom corner. Pretty, right?
 |
| Throw size Hemispheres by Brooke Boon |
But how about some prints? What would it look like in prints? Just as beautiful, see! And print/solids combos are always wonderful!
 | |||
| Crib size Hemispheres quilt top by Abby West |
 |
| Crib size Hemispheres quilt top by Lisa McGriff |
 |
| Wall size Hemispheres quilt top by Kelly Smith |
Color
If you haven't noticed, this is a very versatile pattern. You can change the look of the quilt in so many different ways just by where you place your color. So, if you look in the back of your pattern, you will notice that you have a coloring sheet! How fun? Here is what I came up with for the wall quilt I will be making during this Quilt Along using mine. I need Halloween themed decorations!

But that's not the only option to change up the pattern with color placement. Check out theses color mock ups.


See how it changes! It is all the same pattern. So get out those colored pencils or markers, and see what you come up with! I am sure there are more variations out there waiting to be discovered than just the ones I have shown.
Cutting
So cutting. The MOST IMPORTANT thing you need to know about this pattern is in regard to the templates. When you print out your pattern, you MUST MUST MUST set your printer to 'no scaling'. If you don't, your templates will not print out the right size. Once you print it, measure the little one inch box to make sure it measures exactly one inch. If you aren't sure how to make sure your printer is not scaling your prints, feel free to comment here or in the Flickr group, and we can help you for sure.Another important cutting tip to maintain precision is to use your rotary cutter and ruler to cut all of the straight edges. You will need to cut the curves with scissors (unless you are awesome with a rotary cutter!), but you can speed up the process and keep your pieces accurate if you use a ruler for the straight edges.
Ok, so Week 1 is pretty benign. But these decisions are important! They will shape the whole quilt. I hope you enjoy coloring with your design sheet and finding your favorite layout. Once you find your ideal scheme, get cutting and get ready for next week!
Also, please share your photos of your fabric picks and coloring sheets in the Flickr group and using #hemispheresqal on Instagram. We want to see your progress!
Monday, October 7, 2013
Hemispheres Quilt Along!
It's time for a new Quilt Along! This Quilt Along will be using my FIRST pattern Hemispheres available on Aria Lane. I am so excited to finally get to debut this finished quilt and pattern!!!!


The pattern is available for purchase as a PDF on Aria Lane, and in order to participate, you will need to buy a copy since we will not be providing templates or specific details of the pattern in the Quilt Along posts.

Tammy will also have Kona Kits available in her shop soon specifically for Hemispheres! How exciting! If you want to make a rainbow one like mine, she will have all the yardage you need packaged together, ready, and waiting for you! Thanks Tammy!
Oct 8: Alyssa pileofabric.com
Oct 9: Lindsey lrstitched.com
Oct 10: Christina thesometimescrafter.com
Oct 11: Jennifer knottedthread.com
Oct 12: Sara sewsara.blogspot.com
Oct 13: Emily esposetta.blogspot.com
Oct 14: Angela cuttopieces.blogspot.com
Oct 15: Rachael thefloralsuitcase.com
Oct 16: Shannon littleluvins.com
Oct 17: Kelly craftytwinmommy.blogspot.com
Oct 18: Shannon masteringtheartofbeingme.
Oct 19: Diane fromblankpages.blogspot.com

Thanks to everyone choosing to participate! It is so fun to get to share this with you and see everyone's different interpretations come to life!


The pattern is available for purchase as a PDF on Aria Lane, and in order to participate, you will need to buy a copy since we will not be providing templates or specific details of the pattern in the Quilt Along posts.

Schedule
Oct 28: Piecing with Pins
Nov 4: Piecing with Glue
Nov 11: Piecing Freehand/Curve Master
Nov 25: Quilting
Dec 9: Link Up
Dec 10-12: Voting
Dec 13: Grand Prize AwardPrizes
Tammy of Marmalade Fabrics is our wonderful Quilt Along Sponsor and will be providing the Grand Prize, as well as two other prizes for me to give away on a whim during the course of the Quilt Along. The grand prize will be a rainbow stack of 40 Robert Kaufman Kona Solids. The prizes to give away during the Quilt Along, well, you'll have to stay tuned for those! :)Tammy will also have Kona Kits available in her shop soon specifically for Hemispheres! How exciting! If you want to make a rainbow one like mine, she will have all the yardage you need packaged together, ready, and waiting for you! Thanks Tammy!
Giveaways
Some of my lovely blogger friends will be posting about this Quilt Along over the next two weeks and each day one of them will be giving away a free pattern! Check the schedule below to see where you need to go each day to win a pattern!Oct 8: Alyssa pileofabric.com
Oct 9: Lindsey lrstitched.com
Oct 10: Christina thesometimescrafter.com
Oct 11: Jennifer knottedthread.com
Oct 12: Sara sewsara.blogspot.com
Oct 13: Emily esposetta.blogspot.com
Oct 14: Angela cuttopieces.blogspot.com
Oct 15: Rachael thefloralsuitcase.com
Oct 16: Shannon littleluvins.com
Oct 17: Kelly craftytwinmommy.blogspot.com
Oct 18: Shannon masteringtheartofbeingme.
Oct 19: Diane fromblankpages.blogspot.com

Flickr
Show us your progress in the Hemispheres Quilt Along Flickr Group! We can't wait to see your quilt!Button
Find the Hemispheres Quilt Along Button on my sidebar! Feel free to grab it and share it on your blog!
Link UP and How To Win
So! On December 9th there will be a linky party set up right here on my blog. Upload your finished quilt to be in the running for the Grand Prize. Alyssa and I will pick finalists from the pool of linky party submissions, and those finalists will be posted here on December 10th. Then it is up to all of you! Come back and vote for your favorite quilt and help pick the winner of the Hemispheres Quilt Along!!Thanks to everyone choosing to participate! It is so fun to get to share this with you and see everyone's different interpretations come to life!
Subscribe to:
Posts (Atom)